

Introduction
Fashion illustration is an art form that requires precision and creativity. One of the most important aspects of fashion illustration is the croquis, which serves as the base for designing clothes. Croquis is a French term that means sketch or rough drawing. It is a basic outline of the human body that is used by fashion designers to create clothing designs. In this article, we will discuss the 12 head croquis, how to draw a 12 head croquis, its use in fashion illustration, and how it differs from other types of croquis.
Table of Contents
What is a 12 Head Croquis?
A 12 head croquis is an elongated form of the 8 head figure, which is the closest representation of the human body. The term “head” in the 12 head croquis refers to the measurement of the length of the body, which is twelve times the length of the head. The 12 head croquis is the most elongated form of the figure and is often considered the ideal proportion for fashion illustration. It is commonly used by designers to create stylized fashion illustrations.
Use of 12 Head Croquis in Fashion Illustration
The 12 head croquis is widely used in the fashion industry to create stylized illustrations. It is preferred by designers because of its elongated proportions, which make the figure appear taller and leaner. The exaggerated length of the legs in the 12 head croquis allows designers to showcase their designs in a more appealing way. The 12 head croquis is used to create fashion illustrations for magazines, fashion shows, and advertising campaigns.
Difference between 12 Head Croquis and Other Croquis
The 12 head croquis differs from other types of croquis such as the 8 head, 9 head, and 10 head croquis. The 8 head croquis is the most basic form of the figure, and its proportions are closest to the real human body. The 9 head croquis has longer legs than the 8 head croquis, and the 10 head croquis has even longer legs. The 12 head croquis is the most elongated form of the figure and has the longest legs of all the croquis types. The exaggerated length of the legs in the 12 head croquis allows designers to create more stylized and exaggerated designs.
Steps to Draw a 12 Head Croquis
Here are the steps to draw a 12 head croquis:
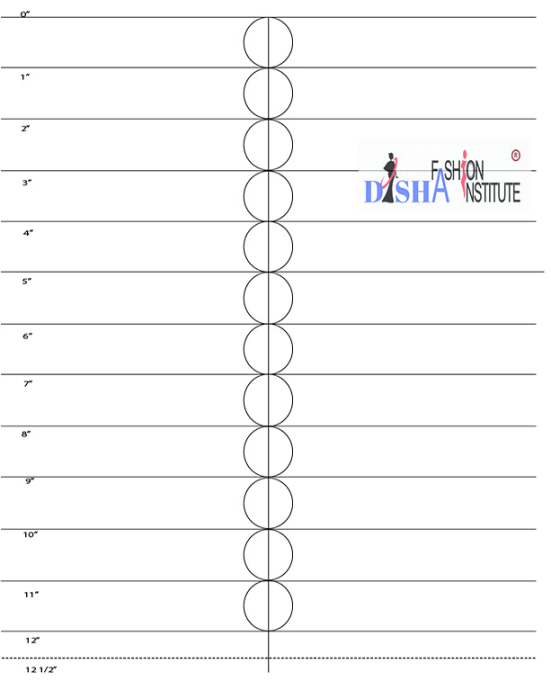
- Step 1: Draw 1 straight line that is 12 inch long
- Step 2: Mark at 1 inch distance from top to bottom
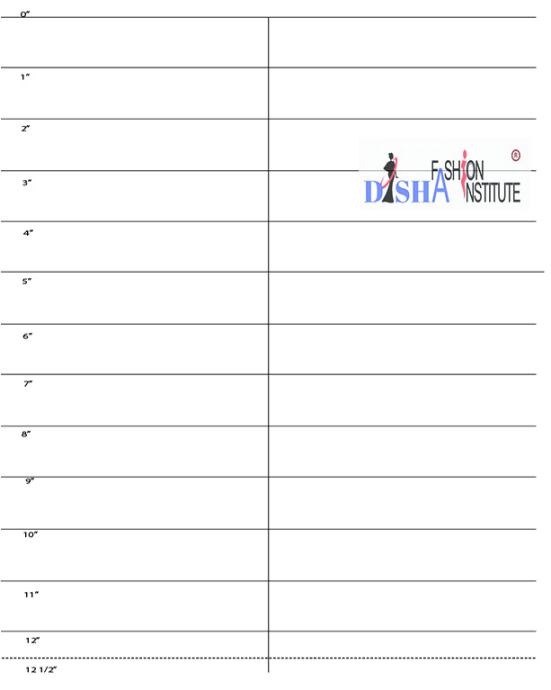
- Step 3: Draw horizontal lines on the marks
- Step 4: Draw an oval for the head about 1” length
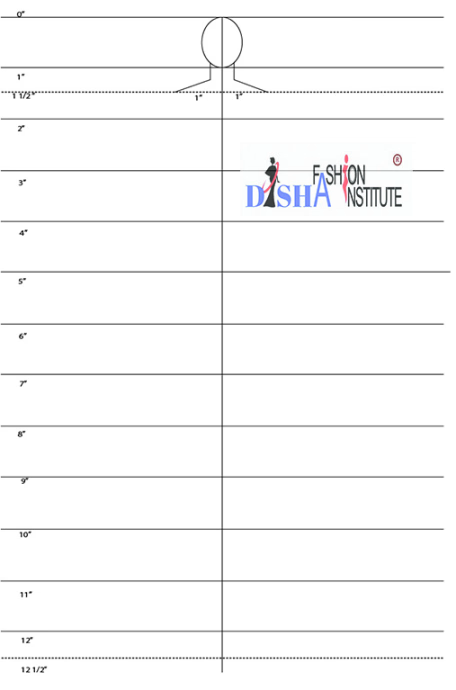
- Step 5: Add a dashed line at roughly 1 ½”
- Step 6: Draw 2 parallel vertical lines just below the head (for neck) and draw a horizontal line for the shoulders of 2” wide (1” wide in both sides of the 1st vertical line). Remember the neck and shoulder line should end at 1 ½” dashed line.
- Step 7: Add another dashed line at 3 ½” (1/2” wide in both sides from the 1st vertical line). This is waist line.
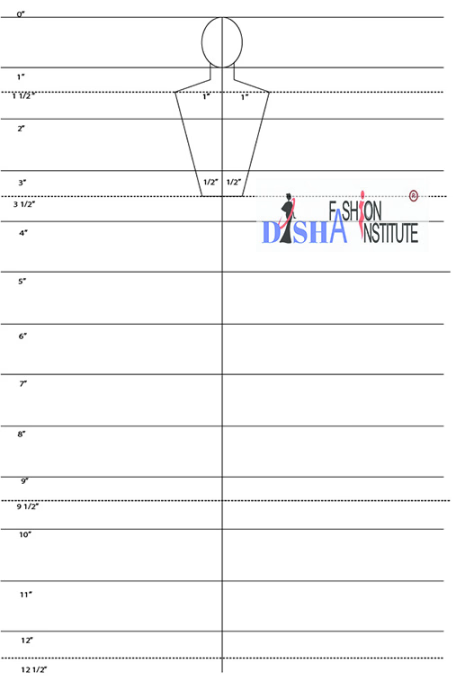
- Step 8: Now join the shoulder and waist line in both sides.
- Step 9: Again add a dashed line at 4 ¾” lengths (width- 1” in both sides from the 1st vertical line). This is hip line.
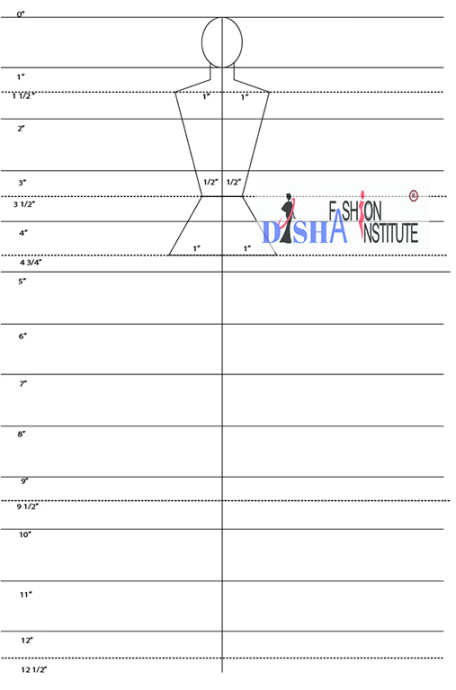
- Step 10: Join the waist line and the hip line in both sides.
- Step 11: Draw two small ovals for hip joint at this height.
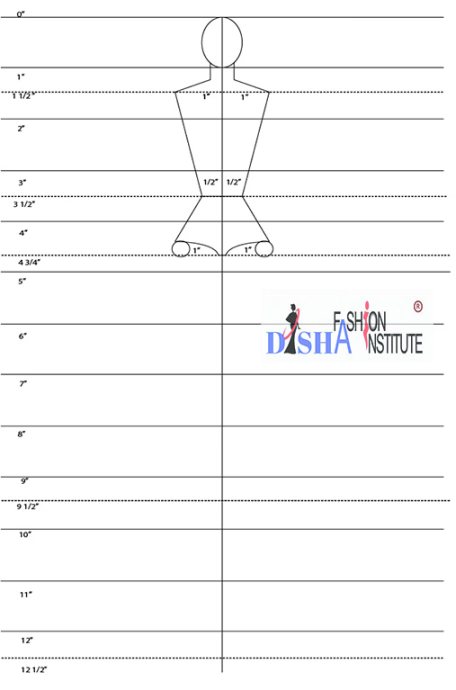
- Step 12: Give shape at hip for drawing upper legs.
- Step 13: Draw two small ovals for knees at 7 ½” height

- Step 14: Draw the upper legs as shown in the photo
- Step 15: Again draw two small ovals for feet joint at roughly 12” or 11 ½” height.
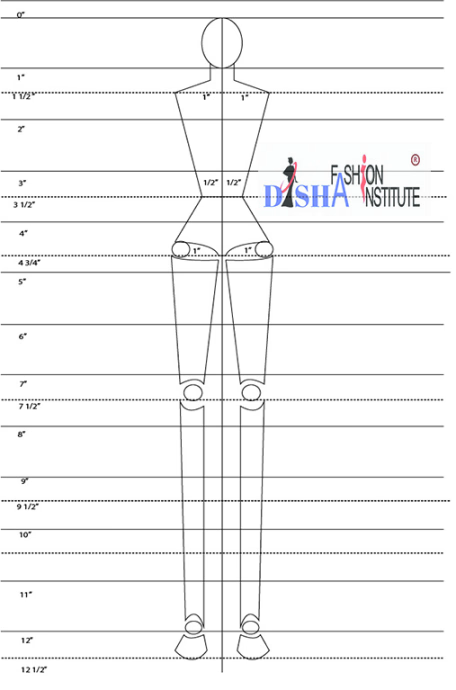
- Step 16: Draw the lower leg as shown in the photo
- Step 17: Now draw the feet of length as per your choice. (In this tutorial roughly ½” height is taken to draw the feet.
- Step 18: Then draw small ovals on shoulder joint and other small ovals at roughly 3 ½” height where the waistline was drawn(for elbow)
- Step 19: Draw the upper arms.
- Step 20: Draw small ovals at 4 ¾” height for wrist joint and draw the lower arms.
- Step 21: Now draw the fingers.
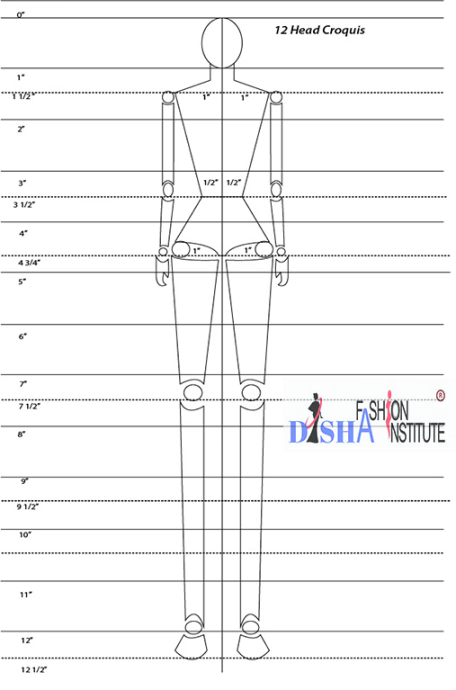
P.S. This is a basic figure outline. You can edit the croquis as your choice, manipulating proportions as necessary.