
Introduction
8-Head Theory
When it comes to figure sketching, the human body is often divided into 8 equal parts, each of which is roughly the size of the head. This technique, known as 8 Head Croquis, is one of four common croquis used in fashion illustration and other forms of figure drawing. Compared to the other croquis types, the 8 heads figure is considered the most accurate in terms of proportion and is therefore widely used by artists and designers. In this step-by-step guide, we’ll take a closer look at how to use 8 Head Croquis to create realistic and lifelike figure drawings.
What does “head” means in croquis drawing?
In croquis drawing, the term “head” doesn’t just refer to the part of the body that sits atop your neck. Instead, it’s a unit of measurement used to create accurate and proportionate figures. The height and width of the head serves as a guide for determining the size of the rest of the body.
When we talk about the 8 heads theory in croquis drawing, we’re referring to a technique that divides the body into eight equal parts, starting from the top and working downward. Each of these parts is roughly the size of a single head, which helps to ensure that the proportions of your drawing remain true to life.
It’s important to note that when we say “8 heads,” we’re excluding the feet from the equation.
What is the ideal size of a head?
There is no ideal or set size for the head. The size of the head can vary depending on the size of the paper or canvas you’re working with, as well as your personal preferences as an artist.
If you’re working on a small piece of paper, you might choose to make each head only a fraction of an inch tall. On the other hand, if you’re working on a large canvas or sheet of paper, you might choose to make each head several inches tall.
However, if you’re working on a standard A4 or A3 size paper, you might want to aim for a head size of 1 inch in height. This can provide a good starting point for creating figures that are proportional and realistic. However, keep in mind that the width of the head is entirely up to you, and can be adjusted to suit your artistic style and preferences.
Necessary tools to draw a croquis
Before you can start creating your own 8 Head Croquis drawings, you’ll need a few basic supplies. These include a piece of paper, a pencil, an eraser, and a ruler.
When drawing your initial sketches, it’s important to use light and gentle lines so that you can easily make adjustments and corrections as needed.
So, let’s start drawing 8 head croquis
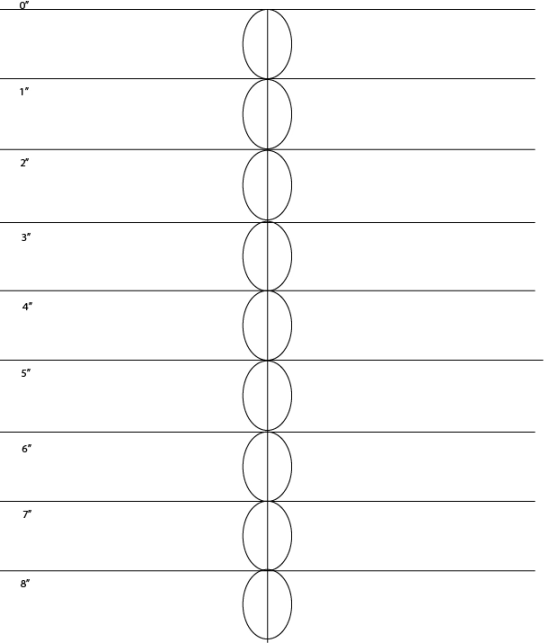
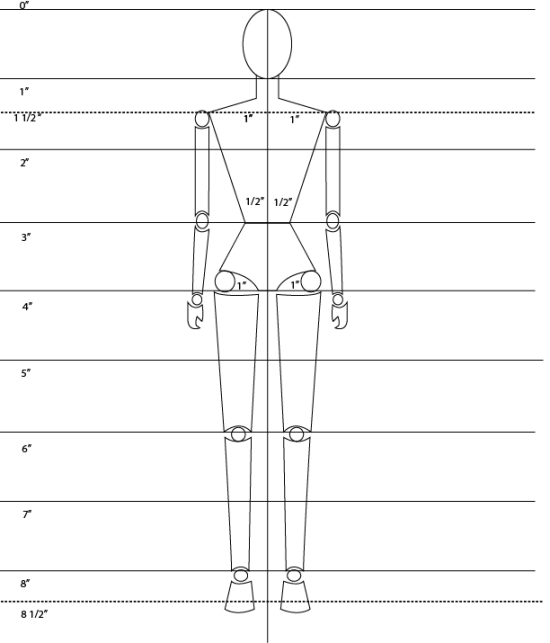
- Step 1: Draw 1 straight line that is 8 inch long
- Step 2: Mark at 1 inch distance from top to bottom
- Step 3: Draw horizontal lines on the marks

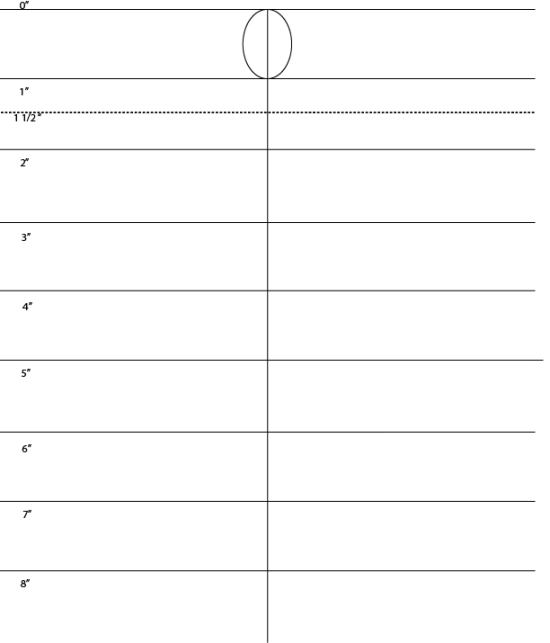
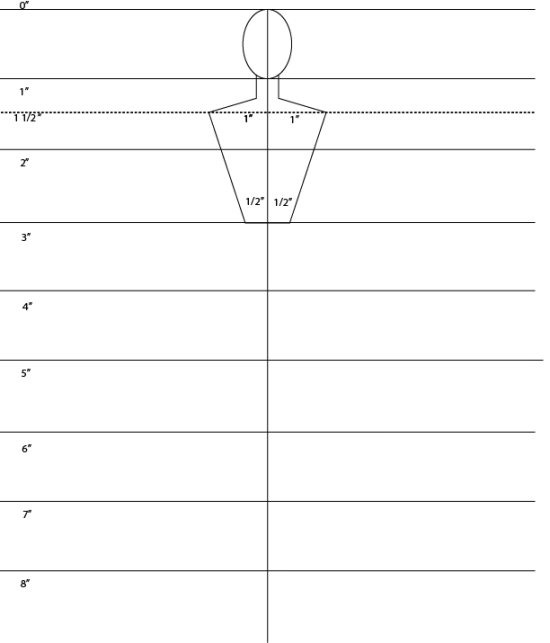
- Step 4: Draw an oval for the head about 1” length
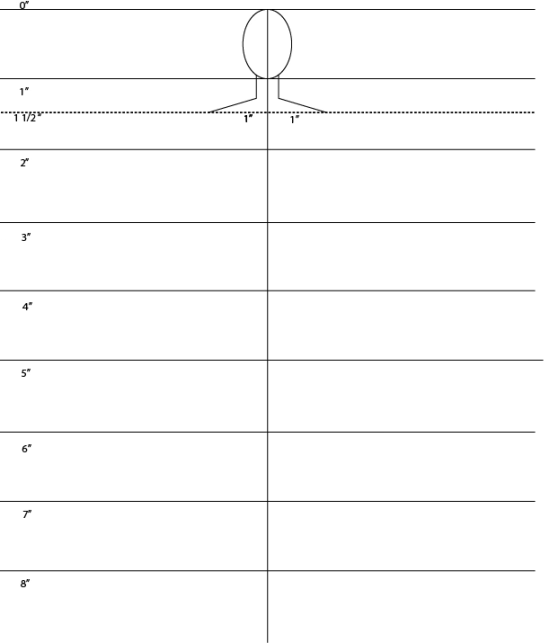
- Step 5: Add a dashed line at roughly 1 ½”
- Step 6: Draw 2 parallel vertical lines just below the head (for neck) and draw a horizontal line for the shoulders of 2” wide (1” wide in both sides of the 1st vertical line). Remember the neck and shoulder line should end at 1 ½” dashed line
- Step 7: Mark at ½” width on 3” height. (P.S. 1/2” wide in both sides from the 1st vertical line). This is waist line
- Step 8: Now join the shoulder and waist line in both sides
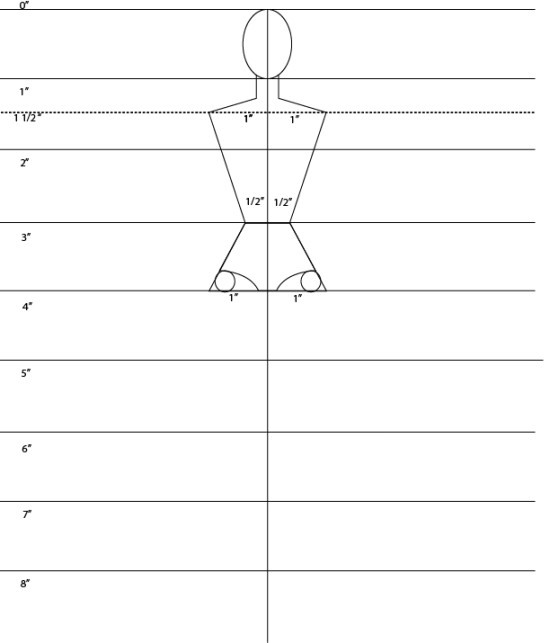
- Step 9: Mark at 1” width on 4”height (width- 1” in both sides from the 1st vertical line). This is hip line
- Step 10: Join the waist line and the hip line in both sides

- Step 11: Draw two small ovals for hip joint at this height
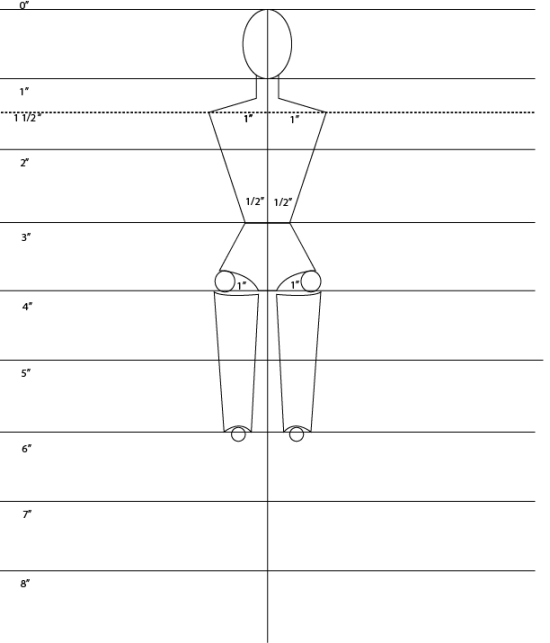
- Step 12: Give shape at hip for drawing upper legs
- Step 13: Draw two small ovals for knees at 6” height
- Step 14: Draw the upper legs as shown in the photo
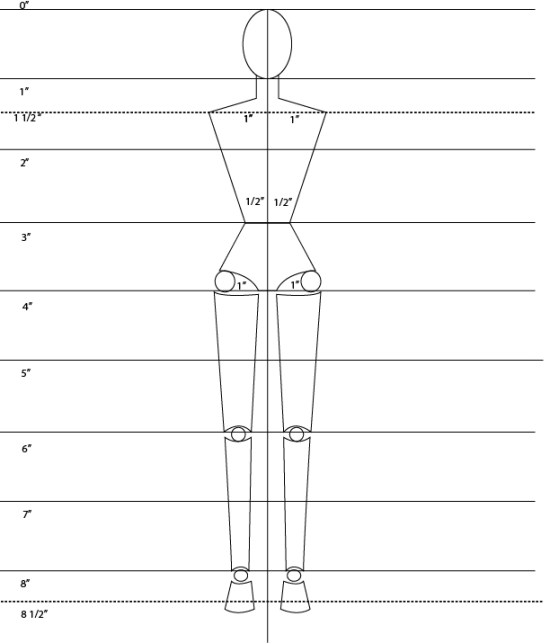
- Step 15: Again draw two small ovals for feet joint at roughly 8” height
- Step 16: Draw the lower leg as shown in the photo
- Step 17: Now draw the feet of length as per your choice. (In this tutorial roughly 1/4” height is taken to draw the feet
- Step 18: Then draw small ovals on shoulder joint and other small ovals at roughly 3” height where the waistline was drawn (for elbow)
- Step 19: Draw the upper arms
- Step 20: Draw small ovals at 4” height for wrist joint and draw the lower arms
- Step 21: Now draw the fingers
P.S. This is a basic figure outline. You can edit the croquis as your choice, manipulating proportions as necessary.